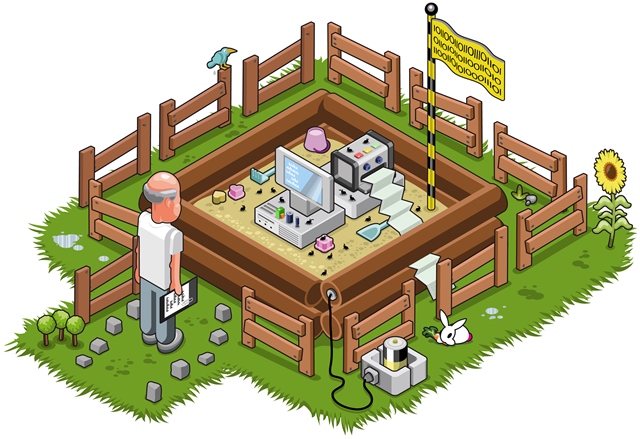
… for you to play around and make mistakes in.


https://en.wikipedia.org/wiki/Virtual_machine
A virtual machine (VM) is an emulation of a computer system.
Virtual machines are based on computer architectures,
and provide functionality of a physical computer.
Their implementations may involve specialized hardware, software, or a
combination.
https://en.wikipedia.org/wiki/Hypervisor
A hypervisor is also known as a virtual machine monitor (VMM)
It is computer software, firmware, and hardware that creates and runs
virtual machines.
A computer on which a hypervisor runs one or more virtual machines is
called a host machine,
and each virtual machine is called a guest machine.
The hypervisor presents the guest operating systems with a virtual
operating platform,
and manages the execution of the guest operating systems.
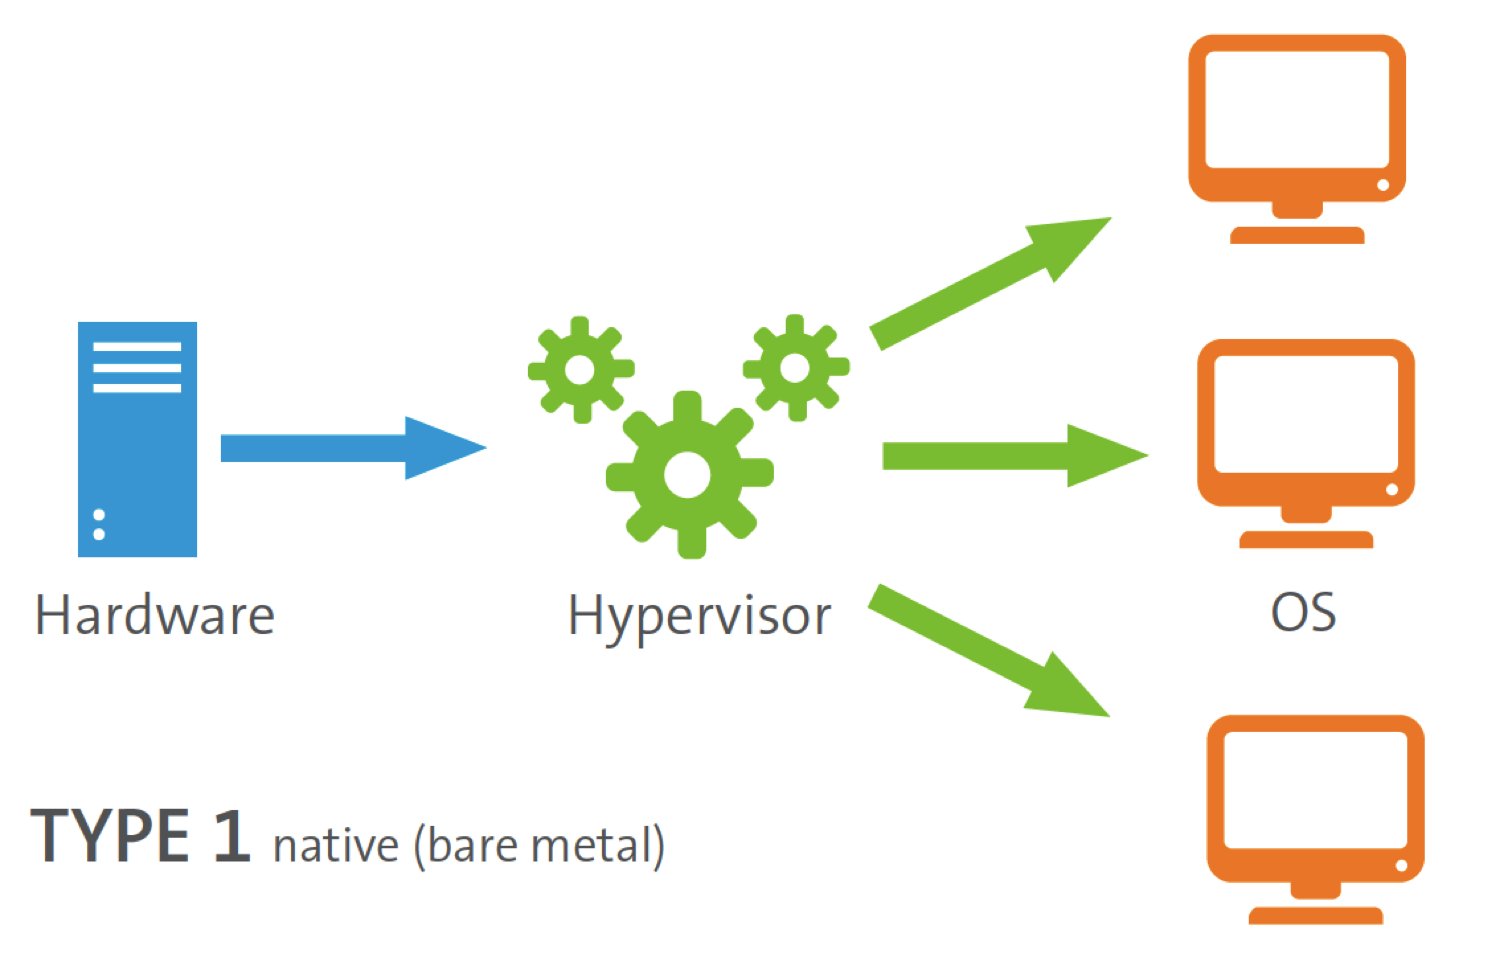
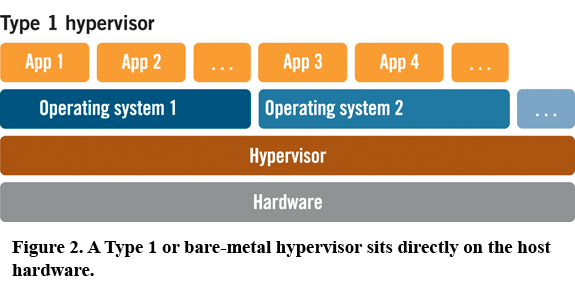
Type 1 hypervisors run directly on the host’s hardware,
to control the hardware and to manage guest operating systems.
For this reason, they are sometimes called bare-metal
hypervisors.
Examples:
Xen:
https://en.wikipedia.org/wiki/Xen
Qubes (Builds on top of Xen):
https://www.qubes-os.org/
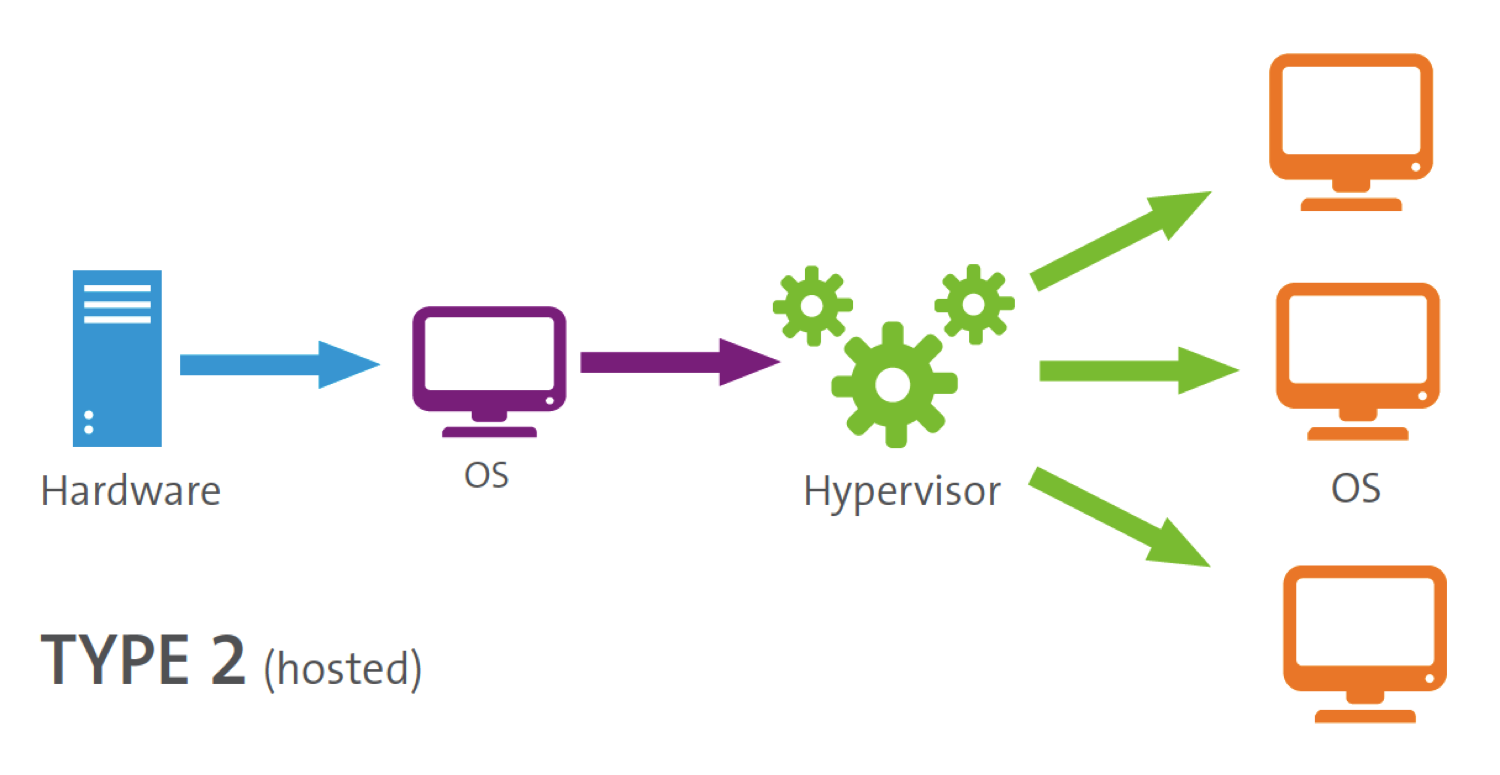
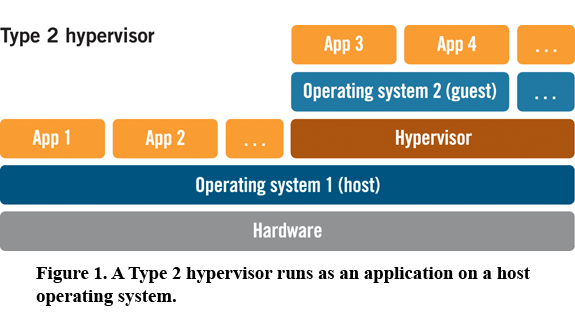
Type-2 hypervisors run on/in a conventional operating system
(OS)w
just as other computer programs do.
A guest operating system runs as a process on the
host OS.
Type-2 hypervisors abstract guest operating systems from the host
operating system.
Examples:
VirtualBox:
https://en.wikipedia.org/wiki/VirtualBox
KVM:
https://en.wikipedia.org/wiki/Kernel-based_Virtual_Machine
++++++++++++++++++++++++++++++++++++
Cahoot-02a.1
A virtual sandbox where you can experiment with coding, hacking,
cracking, etc.
Snapshots allow reverting to earlier states!!
You can do software unit and integration testing on
other operating systems.
Security and isolation (Graders run student code in a
virtual machine for example).
Good computer hygiene (keep your OS clean).
Train yourself on the numerous platforms where software development
usually happens.
The use of virtualization is truly massive,
and is pervasive in software development, software testing, network
engineering, and web design.
Migrations of many computer systems from facility to facility is more
efficient.
Re-engineer your network faster.
Energy bills are lower (more efficient use of computer resources).
This list could go on for pages, just “duck it”:
https://duckduckgo.com/?q=why+virtualize
https://duckduckgo.com/?q=why+run+a+virtual+machine
You can either run a VM on your machine, or campus machines.
If you want to run VirtualBox on your own computer,
you may need to change some boot settings.
This does not harm your computer…despite the warnings.
If you are running Windows,
then open your BIOS (Mac virtualization is usually enabled by
default).
F2, F8, or other function keys, and/or “Advanced Startup” from within
Windows may help.
Use your favorite search engine to find out how for your particular
laptop.
Once you have figured out how to enter your BIOS,
then enable any features that sound like:
virtualization, vt-x, vt-d, AMD-v, AMD-vi, NPT, RVI, etc.
Make sure you have >=20 Gb of free hard drive space, and >=4Gb of
RAM.
Download VirtualBox: https://www.virtualbox.org/wiki/Downloads
If you are running MacOS,
then you want VirtualBox version 6.0, not version 6.1 (VM’s
crash).
Install VirtualBox:
Launch and click through all, accepting the defaults (Mac and
Windows).
VirtualBox kernel modules require a restart,
even in Unix-based operating systems (Mac, Linux, BSD, etc).
VirtualBox may not play well with the ARM architecture on MacOS,
so you may want to try another VMM of your choosing.
If you are on Linux already,
then you could use Virtualbox in the system repos,
or KVM or Xen instead, if you want to be adventurous.
This option could be quite slow, and I don’t really recommend
it.
If you want to use campus computers (Windows CLC),
then open AppsAnywhere, and launch VirtualBox.
Everything should be ready to go.
Use the S-DRIVE (recommended) or your own USB drive (slower) as your
install location,
to store your virtual disk image,
not the C: drive (which forgets your install upon reboot)!
When using the S drive,
you can launch the VM by double-clicking on the VirtualBox file,
where you stored it, and VirtualBox will automatically open.
Then, choose an operating system (I recommend Fedora), with more
details here:
LinuxBash.html
Typically, you just need the default install options.
++++++++++++++++++++++++++++++++++++
Cahoot-02a.2
Host and guest additions
Extension pack is not required, and really only needed
for things like fancy USB-3 peripherals.
Guest additions: helpful for shared folder, for example.
Shared clipboard
Menu: Devices > Shared Clipboard > bidirectional
Shared folders: Platform-dependent (DataStructures will go
over in lab)
In host: in VirtualBox GUI settings for your VM, enable a shared
folder
Choose location in host to share.
Check auto mount and permanent.
Just after installation, but before using your VM for anything,
shut down, and create a snapshot!
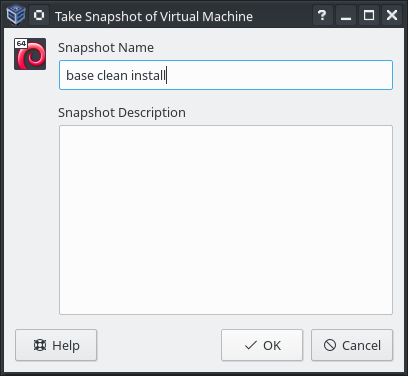
Then, use your VM to your heart’s content, but before you
update,
refresh the snapshot, getting rid of any potential contamination.
Then, do updates, snapshot again, and delete the original
snapshot;
you have another clean base.
Use your VM, rinse, repeat.
Show: demonstrate snapshots for updates, browsing, breaking the OS.
Open up the file browser, how to look around.
Open up the terminal, how to look around.
Skim first section of LinuxBash (which we will
repeat again in a couple days).
What is a bash terminal, how is it like the python interpreter?
Make a simple bash script.
Open an ipython3 interpreter/shell.
Make a simple a python3 script, run it via
ipython3.
What are the commands: python3, ipython3,
python?
Open an IDE, make another python script, show help, linting, debugging,
auto-completion, object inspection, etc.
Go to git-classes, login.
Create a repository.
Clone the repository.
Edit some files, add, commit, push, etc.
If you’re still curious about virtualization, keep on reading:
../../Security/Content/Virtualization.html
Next: LinuxBash.html